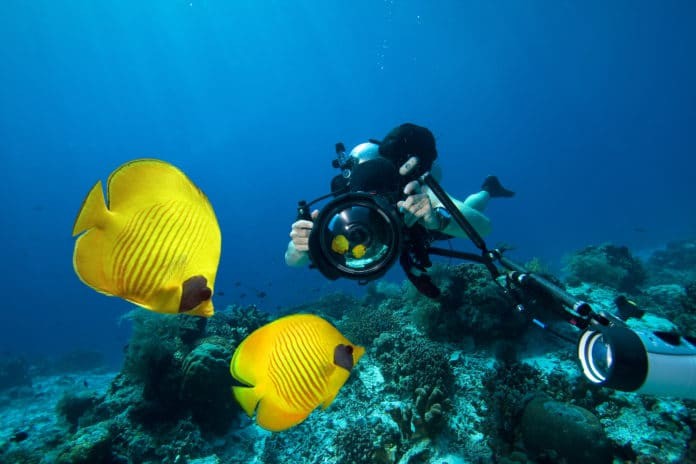
Getting that first underwater camera adds a new dimension to your underwater adventures. While a DSLR camera complete with underwater housing and external strobes will give you the greatest control over your photographic images, the same principles apply to every camera. I would like to present a few pointers to get you on the right road.
Practice Makes Perfect
Practice and practice some more. Unlike getting a new regulator or DSMB you can practice with your new camera above water. One of the first thing you should do after charging your batteries is sitting down with the owners manual of your new camera. Most cameras now days come with a quick start guide and a user manual often in a digital format. Use the quick start guide to get your camera ready. Find a comfortable place to read the manual, have your camera and favorite beverage nearby and then walk your way through the owners manual and find out everything your camera can do. One great think about having a digital camera is that there is no expense incurred to practiced.
Film cameras could get very expensive very fast if you indiscriminately took photos. The cost of film, the limited number of photographs per roll and the expense and delay getting them developed and printed meant you really could not waste many frames. Today, shoot as often you want, delete the ones you do not like and try again. As you read your manual take a few images and see how things change with different settings. Get use to all of the controls. You will want to be familiar with everything your camera can do.
Take your camera outdoors and take as many photos necessary till you are comfortable with all of the controls. If you dive with gloves on, wear the gloves sometimes to get a good feel for the controls.
Understand How Light Creates An Image
The play of light on an object is the key to photography and most other forms of art. The artist will spend decades striving to understand the play of light. Photographers will as well. However, just understanding the basic concepts will move you along nicely to creating great images. Again lighting is something you can practice on land to learn how to work with shadows and contrast, two of the key elements of lighting. Underwater, we have a few Additional concerns. The first is the filtration of light by the water. If you have taken the Advance Open Water Diver course or the Deep Diver course you would have likely experimented with the lost of colors at depth. At the surface and then slightly under you observe a color panel with some color samples. As you slowly descend, you will notice that the colors are getting dulled until they finally appear as just a shade of gray. Here is approximately what you will observe:
- Red – Clear water filters out 90% of the color red by the time the light has traveled just 15 feet.
- Orange – The color orange is 90% filtered out within the distance of 25 feet.
- Yellow – The color green is the next one to disappear at around 35-45 feet.
- Green – When the light has traveled around 70-75 feet 90% of it has been filtered.
- Blue – When you reached the depth of 110 to 130 feet the last of the colors will be reduced by 90%, leaving everything in shades of gray.


Another factor at work here is the reduction of light. The surface of the water will reflect some of the light back into the atmosphere leaving some to continue into the water. Refraction will cause the light beams to bend. This has little impact on the reduction of the level of light but can cause some influence on how object appear. Particles within the water diffuse the light further reducing the quality and intensity of the light. Photographers, both above and below the water, will often diffuse a light source to reduce harsh shadows so the diffusion itself is neither good or bad, it depends on the impact. Another tool that photographer use is a reflector. This is a device that reflects light back on a subject. Images of models at a photo shoot will often show the use of a reflector. While underwater, a sandy bottom may also act as a reflector, providing light back on your subject. Reflected light is often used to lighten shadows and help create a dimension to the subject. Dim light will reduce the color recorded and have a lower contrast. Depending on the features of your camera, you may only get blurred objects with your camera in low lights without a flash.
Exposure is the balance on how the light is recorded by your camera. Like light itself, exposure is a complicated topic that photography schools spend an enormous amount of time on. Most introductory cameras including most point and shoot cameras have automated this process and provide generally acceptable results.

Basic Composition
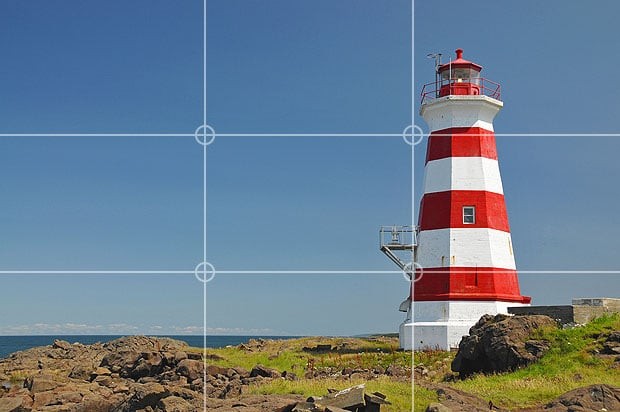
Photo composition is one of the things that make photography an art. It is the interpretation of the photographer on how the final image will look. While there are a few simply rules to get you started, the composition can create the balance of an image, it can make it look static or it can make it look active and exciting. The use of negative spaces can draw our eyes into a photograph or painting in a way that might not be as you first imagined. One of the simplest composition concepts to understand is called the rule of thirds, not to be confused with the scuba diving rule of thirds.
The “rule” tells you to mentally create three vertical and three horizontal line across your proposed image. The most important portion of your subject should be at one of the locations where these lines intersect. The placement can also introduce a sense of movement and scale.
The use of foreground elements is also something you should learn and consider using. One way to do this is to create a frame that draws your eyes into the photo. A pair of sea fans might be used to frame a Moorish Idol to force the viewer to concentrate on the fish. A small out of focus coral head in the foreground may add depth of perception to that image of a shark in the distance. The color in the foreground may offset the colors lost around the shark leaving it with a blue cast. Remember never move coral or marine life to place them where you want them in an image.
Learn the Basics
There are a number of outstanding underwater photography classes and certification courses you can take. My suggestion is before taking that route, learn what you can on your own. There are a number of free photography courses online that will give you the fundamentals that you need to understand general photography. Once you have some competency with that and your camera, look online for tutorials on underwater photography. Learn what has to be done different and give it a try.
You might want to consider a special photograph trip, for example the Cozumel Festival.

