

This article is part of the Beginners Guide to Scuba Diving
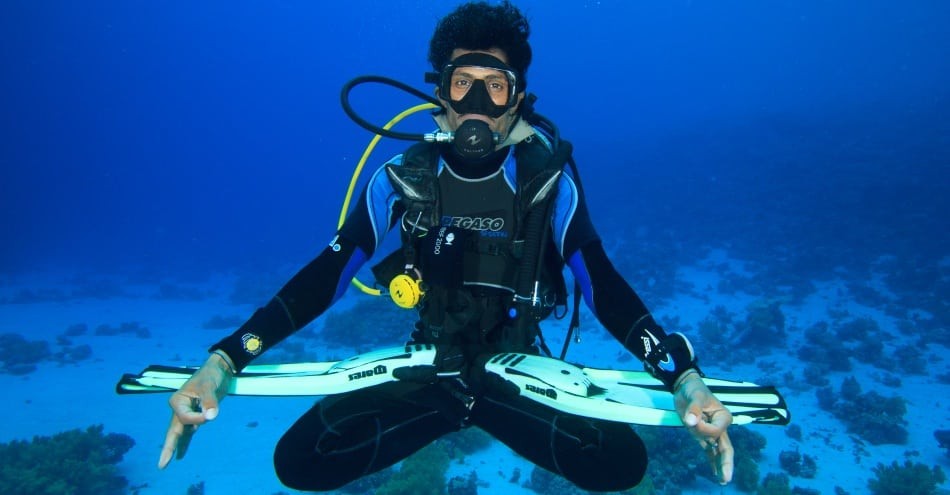
Fancy to feel like an astronaut doing an EVA, an Extravehicular activity. Astronauts train for spacewalks required to repair the International Space Station (ISS) in a specially built swimming pool. The feeling of astronaut weightlessness in space is almost identical to the feeling of a neutrally buoyant scuba diver.
Becoming a skilled diver able to maintain neutral buoyancy is a task that takes time for many divers. However, it is time well spent. The neutrally buoyant diver uses less air adjusting their buoyancy. They also are better streamlined and offer less drag as they move around. These savings in air consumption translates to more air for breathing and therefore longer dive times.
Great buoyancy control also results in less accidental damage to marine life and might keep you from damaging your equipment or yourself. Drift into a sharp piece of metal on a wreck or some fire coral and you will understand what I mean. Being underweight can mean an uncontrolled ascent and a trip to the hospital or morgue.
Your open water diver training gives the basics you need to understand the concepts but not the experience. Most divers dive overweighted. This means they need to use more of their air supply to counteract the additional weight. While the first impression is that it cannot be much, there are other factors. The more air that is in the bladders of a BCD, the more resistance it provides when trying to move. The larger bladder makes you use more energy to move them. Many divers never really achieve the art of neutral buoyancy, mostly because they do not try.
While the training agencies offer programs to improve your buoyancy control, if you know the concepts, you with the help of your dive buddy can do it yourselves. There are really two points, diving with the proper weight and properly adjusting for changes in buoyancy.
Principles To Being a Better Diver through Buoyancy Control
-
- Calculate your weights: There are many websites and training publications that give you calculators on how to calculate your weights. That is all well and good, however, if on your last dive you were not positively buoyant at the end of the dive, you already have a top-end weight so start from there if you wish. Each dive may have slightly different values as you change locations or equipment. One purchase suggestion, if you do not have your own wet suit get one. Most of the calculators will tell you to add a certain percentage of your body weight based on the wet suit thickness to your weight belt. As an example 5% for a 3mm wet suit. The age and condition of a wet suit will change the amount of buoyancy and thermal protection it provides. When I purchased a new wet suit and retired an old one, I had to add 4 pounds (almost 2 kilograms) to my weights. When you log your dive make sure you also log your weights if you felt you were over or underweighted and what type of tanks and wet suit you were wearing. Over time this will help you fine-tune your standard. Once you have that, you can easily figure out what weights need to be added or subtracted with different configurations.
- Check weight and buoyancy control: When you were in your training, the instructors used different methods to check your buoyancy at the surface. Most people suggest the surface float method that is recommended in training. In training, they tell you that you are properly weighted at the beginning of a dive if you float at eye level when holding a normal breath and slightly sink when you exhale. Then they say you need to add weights to get down. They do the same thing with a near-empty tank. That is with a near-empty and you are motionless at the surface, you should float at eye level when your BCD is empty. There is a much more accurate method that only takes a few minutes and a little advance planning. This is the 5 meters/ 15 feet float. The 3-minute safety stop at 5 meters is the critical balancing point for your weights. Your goal is to remain at the same depth for the 3 minutes, while at the same time you are near your maximum buoyancy control for that dive. This exercise will zero in on the weight you need to carry. Before the dive, remove four pounds of weight from your belt. Place two 1 pound weights in one pocket of the BCD and a 2 pound weight in the other. You will need the same configuration of weights available to you at the end of your dive, either attached to the hang bar or carried by another diver. What you will want to do is take the tank to “empty”, remove all the air from your BCD and remain at 5 meters for one additional minute, rising and falling by breathing. Your “empty” should be about 30 bar or 450psi. This is below what most dives are planned for, however, still not an out of air situation. During your safety stop, start making your adjustment by adding or removing weights as you empty your BCD. When you are neutral without air in BCD and at your target pressure slowly surface. You should find that you will become slightly buoyant. This positive buoyancy will not affect your rate of ascent. Coordinate your activity with the dive leader so they do not stress.
- Take the steps not the elevator: You hear that same advice to lose weight so I guess it is related. Divers with too much weight on their dive belt needs to lose it. Divers often get into the habit of using the inflator button or dump valve to go shallower or deeper. If you are at neutral buoyancy, taking a slightly deeper breath than normal will cause you to rise slightly, while holding your exhale will take you deeper.
- Float down not sink: Most divers descend by venting the air from their BCD and sinking towards the bottom. As you sink, the water pressure makes the air in your BCD and wet suit compress giving less buoyancy control, causing you to sink faster. When they get close to the bottom of the depth they want, they frantically add air to the BCD. The result is they finally stop, but since they are not fighting inertia they start to bounce back to the surface and have to dump air. Buoyancy control on your descent is as important, but not as dangerous, as controlling it on the ascent. As you start down, slowly add air to the BCD seeking to maintain neutral or slightly negative buoyancy. Unless you are doing a shallow dive, consider stopping yourself every ten meters. This gives you a chance to adjust your equipment and check your dive buddy. As you get close to your target depth, flare your body. Parachutists do the same thing. If you watch any movies involving parachute formations, you can see they go from a streamline position to a stretched or flared out one, exposing more of their body to the air stream. This flaring is a good technique to practice going down and can be a lifesaver if you start an uncontrolled ascent. It works going up as well and may slow you enough to give you time to get the situation under control.
- Hang around and Keep Trim: When you do your safety stop, your goal is to stay at one depth. If there is no current, you attempt to hang in one place. Most divers keep on the move during the dive and it often it is not necessary or sometimes desired. Muck divers looking for small forms of life will often hover a meter or so above what they are looking at. Hovering is also important to the photographer, so it a task to practice for reasons other than the safety stop. Hovering helps you fine-tune your neutral buoyancy and breath control.
One of the traits of an excellent diver is that they are well-trimmed. Like an airplane in flight, the distribution of weight will affect its flight. While you are practicing your hovering, you may find yourself “falling” over. This is an indicator that your weight is not equally balanced. If you are hovering horizontally, it may cause you to roll over. Adjust the position of your weights to balance yourself.
These simple steps practiced on a number of dives will help you become a safer and more efficient diver.
Click here for more articles in the Beginners Guide to Scuba Diving
Brought To You By

Our Beginners Guide to Scuba Diving is brought to you by Pearl Fleet. Pearl Fleet invites you to embark on their exquisitely crafted yachts for the finest diving experience the world has to offer. From purposefully designed diving itineraries to high-class amenities, Pearl Fleet’s immersive getaways allow you to indulge in your passion as you journey to world-class diving destinations. You can find out more at pearlfleet.org.
Comments are closed.